6/22/11

June in the Vegetable Garden

June has seen many changes to the vegetable garden. We've had about 1" of rain in the last week, after nearly 8 weeks of dry hot weather. I resorted to watering with the sprinkler, which you can see outside the corner of the garden. On the longest day of the year, June 21st, our area officially got 12 hours and 34 minutes of daylight, with sunset at 8:56pm. Here's the garden update:

  1. SWEET POTATOES - I planted 11 sweet potato plants, half as many as last year: two which I grew from last year's potatoes (my other efforts failed) and a 9-pack of "slips" I bought,  all "Beauregard," a dependable variety for our area, and the most common supermarket sweet potato variety. I planted where the edible pea pods had been, after they had stopped producing in late May. About 2 weeks ago I noticed the sweet potato leaves were being eaten, and, when I sprayed my Garlic Barrier on them, I saw grasshoppers jumping away. I've never had a grasshopper problem, but I've heard they can devour the garden. In addition to spraying, I've also been scattering cut-up garlic greens around the plants and this seems to have solved the problem.
  2. EGGPLANTS - I bought 2 mesh laundry hampers and turned them upside down over the wire cage on each eggplant to help protect the plants from the bug which eats the young tender leaves. I used wicket-type garden stakes to hold the handles of the hampers in the soil. It's helping so far. I'll have to remove the coverings when the plants flower, so the bees can pollinate. As the season progresses last year, the bugs became less of a problem and the plants flourished, so perhaps I can go into flowering with healthier plants this year. These laundry hampers do not have netting on the top, but rain or sprinkler spray gets in on all sides. They fold down flat for easy storage too.
  3. JALAPENO - I kept one jalapeno plant in the red Kozy Koat and it already has pods! Couldn't resist planting a second seedling I had started, but there is a noticeable difference in the size of the two plants.
  4. MELON - One "casaba" melon is growing well and has a green fruit about 6" big already. I keep checking the plant for insects which attack squash family plants (see photo and zucchini info).
  5. LEEKS - Most of the transplanted leeks didn't survive, but I'll still have plenty. Don't think I'll try them again though.
  6. CUCUMBERS - My attempt to grow the cucumber plants in vertical cages is going well. They send out tendrils, and I usually just have to coax them to grab and wrap around the cage wire. The fruit is clean and perfectly shaped. I've been picking both varieties, one pickling size and the other a 6-8" salad cucumber. I keep watching the undersides of the leaves for the brown eggs of the squash bug (see photo), and discard any leaves with eggs.
  7. TOMATOES - The photo shows the growth of the tomato plants in the past month, but I nearly lost them to an attack by big fat healthy tomato hornworms. The earliest plant I had put in the garden, which had looked gorgeously healthy just one day earlier, was totally defoliated. The other 5 plants each has one or more worms eating away. Fortunately, I caught them right away (it pays to visit your garden daily) and successfully treated with "Dipel," an organic biological insecticide for leaf-eating worms and caterpillars ("bacillus thuringiensis"). I dug up the defoliated tomato and replaced it with one of 3 cherry tomato plants a friend gave me, which I had planted in the cold frame. I've also kept the bottom 10" of the tomato plants trimmed to the center stem, which seems to be helping me avoid tomato blight, which is a fungus spread from the soil to the lower leaves. When I see a leaf with yellow spotting I immediately pick it off and discard. With all this effort, I've now been picking juicy red tomatoes for 3 weeks from the Riessentraube and the Al Kuffa heirloom varieties. I'm keeping a close eye out for pests.
  8. BEANS - My favorite variety of green beans is Blue Lake. I plant the "bush" version vs. "pole" beans, which grow only about 12" tall and don't need trellising. Blue Lake tastes great and freezes well. I planted marigolds around the beans and keep breaking up the spent marigold flower heads on top of the bean plants, to deter an invisible insect which eats holes in the bean leaves, and potentially, in the beans. L:sat year the bugs ruined my crop. I've picked just a couple of ripe beans in the last couple of days and eaten them raw, and I'll have lots to harvest for dinner starting in a few days. I've also started a small bed of Golden Wax bush beans and a long bean from Thailand.
  9. GARLIC - Before we got last week's rain I harvested about 2 dozen garlic heads. Garlic is ready to dig up when the green tops turn tan and dry. It's best to dig them when they are not wet. I rinsed them off right away, which is not recommended, but our clay soil is either like peanut butter when wet or like concrete when dry. Then I dried them in the sun for a few hot dry days before moving them onto newspapers in the shade of the porch to dry for a few weeks. This prepares them for storing.
Also in the garden...


CARROTS - I've finally been harvesting carrots and they are delicious. I like that it's a crop I can leave in the ground, just pulling what I want to use immediately. I've decided I have the patience to grow them, and I've continued to do more plantings from seeds.

BEETS - We ate beet greens initially, and now I've been roasting the pink and white zebra striped Chioggia beets. I'm proud to say I successfully grew them from seeds I harvested from my own plants in their 2nd year. The size of the beet root seems more dependent upon how much room you allow between plants than on how long they are in the ground.

ZUCCHINI - Pulled up the one zucchini plant which had quickly gone from lush and healthy to wilted and sickly. I think it suffered from a squash vine borer. I'll try another plant again in July.

BRUSSELS SPROUTS - I also had to dig up the brussels sprouts. Just as the little Barbie-doll size cabbages began to form on the stem, the leaves unfolded immediately. This is due to our hot weather. I'll try growing it again in the fall, which is what is recommended for my zone.

LETTUCE - We ate the last of the romaine and Little Gem Lettuce. So far I haven't been able to get any of my heat-tolerant varieties of lettuce to germinate well. :-(

BASIL - With lots of pesto still in the freezer from last year, I only put in 4 Thai basil plants, which have a really strong flavor. This way I have some to pick fresh, which I love in a Salad Caprese, with tomatoes and mozzarella.

FENNEL - I moved small fennel plants which had over-wintered and now they are flowering. I will save the seeds which follow the flower, a licorice taste used in Italian cooking, and I've been slicing up the stems and adding to roasting vegetables.

PARSLEY - Both curly and flatleaf parsley plants I started from seed are growing well. This week I picked lots and made tabouli, and I'll share my recipe on this blog soon.

POPPIES - In another garden bed I am growing "Breadseed Poppies" and the flower is an old-fashioned purple shade. I grow red poppies and the seeds they produce are tiny, so I am hopeful that this variety will be larger and suitable for me to use in cooking.

GARDEN HUCKLEBERRIES - My two garden huckleberry plants have suffered from bug-eaten leaves since I first set the seedlings out, but this hasn't hampered the production of flowers and berries. I picked a cup full one day recently, put them in a saucepan with a small amount of honey and some cornstarch dissolved in blueberry juice, to thicken as it cooked. I mixed the cooled sauce into plain yogurt and it tasted great. The raw berries sort of taste like blueberries but with a slightly bitter bite, but were great when cooked.

STRAWBERRIES - My strawberries ended production in late May, and I dug up approximately 12 dozen plants from the big mass I had left to grow at the west end of the strawberry border. I am trying to keep the baby plants clipped off the established bed, but will allow some to root later in the summer for more friends who want to start their own bed. Let me know if you want any.
I removed the coldframe covers, and the frame itself is permanently attached to the garden corner. Two little cherry tomato plants are all that is growing inside now.

Happy gardening!

6/3/11

Cool Strawberry Cream Pie

It's been in the 90s all week... the perfect time for a no-bake pie made from freshly picked strawberries. You can short-cut this recipe by using a purchased graham cracker crust and topping my cream filling with your favorite strawberry jam. But I'll guarantee my made-from-scratch version is luscious! My short-cut is to use the food processor for each of the three layers.

CRUST:
2 c granola*
2 T softened butter or coconut oil

CREAM FILLING:
8 oz Neufchatel cheese (or cream cheese), softened
1/2 c cottage cheese or plain yogurt
2 T lemon juice
1 t grated dried orange peel
2 T honey

FRUIT TOPPING:
3 c fresh cleaned and hulled strawberries
10 drops liquid stevia (or other sweetener)
1/2 t ground cinnamon
1/3 c fruit juice
1 t agar agar flakes** (or 1 T corn starch or arrowroot)

Whirl the granola into fine crumbs in a food processor and mix well with the butter or oil. Press the mixture into the bottom and sides of a 9" pie plate.

Rinse the food processor and mix all the cream filling ingredients until smooth. Dump the filling into prepared pie shell, spreading to the top of the granola crumbs and smoothing the top flat. No one will ever guess that cottage cheese is used in this delicious slightly sweet filling!

Rinse out the food processor and chop the strawberries by pulsing a just a few times - don't over process or you'll end up with a wet puree. Put the chopped berries in a bowl and add the stevia (or your choice of sweetener) and cinnamon. If the berries have shed a lot of juice, pour this off into a measuring cup; otherwise use 100% fruit juice, like blueberry or grape juice, and heat 1/3 cup to boiling. Stir in agar agar flakes and simmer 5-10 minutes until the mixture thickens. Add this to the strawberries and mix well. Let this mixture cool. Spoon the strawberry mixture over the cream filling, and refrigerate for at least one hour before serving.

This recipe will work well with other fresh fruit, like blueberries, blackberries, peaches, and others. Try fresh red raspberries with a chocolate cookie crust - yum!

* See this blog for my recipe for homemade granola, or use your favorite purchased mixture

** Agar agar flakes are a thickener, much like unflavored gelatin, derived from a sea weed. It is commonly sold in health food stores. Alternately, you can thicken the juice with cornstarch, used in the same way as the agar agar flakes.

5/24/11

Quick & Easy Pickled Vegetables

Pickled edible pea pods are delicious!
Refrigerator pickles are basically just vegetables marinated in vinegar with herbs and spices. They are quick and easy to make. Since there is no cooking involved, the vegetables are crunchy and yummy. You don't need to do any canning or seal the lids; you just mix the ingredients, fill and cap the jar, and start eating a few days later. Unlike store-bought pickles, these have no food coloring, no preservatives, and no refined sugar.

Here is a very simple recipe for making one jar at a time, which I like to with my freshly picked garden harvest:
  • 1 clean pint jar with a lid (a recycled peanut butter jar works fine)
  • Approximately 2c fresh raw vegetables, such as small or sliced cucumbers, snap beans, pea pods, pearl onions, baby or cut carrots, small or sliced zucchini or yellow squash, radishes
  • 1-1/2 t salt
  • 1-1/2 t pickling spices*
  • 1/2 c white vinegar
  • water
Measure salt and spices into the jar. Fill the jar with your prepared vegetables, tightly packed, to 1/2" from the top. Pour vinegar into the jar. Fill the rest of the jar to 1/4 inch from the top with water. Cover tightly, shake to distribute the spices, and refrigerate. After 24 hours the vegetables will begin to season; bright green veggies will begin to turn more olive colored. It takes about 2 days to fully develop the flavor. Since these are not preserved, they should be eaten within 2 weeks.

* Pickling spices can be purchased premixed. One I've used includes mustard seed, peppercorns, dill seed, cardamon, cassia, ginger, coriander, allspice, chili pepper seeds, cloves, and bay leaf. If you make your own it's cheaper, and you can customize the ingredients. Here's a simple mixture I have used:

Pickling Spice Mix
  • 1/2 t celery seed
  • 1 T dill seed (easy to grow and harvest from your own herb garden!)
  • 1 T mustard seed
  • 1 t hot pepper flakes (I save my home-grown jalapeno seeds when I dehydrate them)
VARIATIONS: Experiment! Use all one vegetable or a mixture of several. Add sliced or whole cloves of fresh garlic or a whole jalapeno to each jar. Substitute apple cider vinegar, lemon juice, or lime juice for all or some of the white vinegar. Add honey or a cinnamon stick for sweetness. Use fresh dill in place of dill seed. If you follow a low-sodium diet, use low-sodium salt or eliminate the salt all together. You can even pickle hard-boiled eggs instead of veggies. Customize to your own likes and these pickles will surely disappear before two weeks pass.

5/20/11

Strawberry Time

'Haven't posted since before the tornado hit our place two weeks ago today… much of my normally busy discretionary time has been reassigned to clean-up after about 200 old hardwoods and pines were twisted, broken, uprooted, bent and downed by the winds.

In more pleasant news, my gardens miraculously escaped harm, and continue to flourish - despite my lack of attention. I've been picking my own delicious big sweet strawberries steadily for the past 3 weeks, a "June-bearing" variety called Tennessee Beauty. The bed I had started two years ago got wiped out by a fungus which I think formed because I had attempted to cut down on weeding by mulching the bed with black landscape fabric, covered with straw. At one end of the black mulch, lots of strawberry baby plants escaped the bed and planted themselves in my bare garden soil, and these survived. I let them grow and prosper, and then harvested lots of rooted babies in the fall. These allowed me to replant the original beds, adding compost to the soil, spacing plants about 12" apart in staggered rows, and not using any mulch. When the flowers began to turn into berries earlier this spring, I put a thin layer of straw around each plant, to keep the ripening berries from sitting in the dirt… makes them nice and clean when picked. I plan to remove the straw after the harvest. Incidentally, note that I said straw, not hay - straw is supposed to be without seeds, while hay will fill your soil with weeds from its seeds. I'll be doing more weeding this year, but hopefully will avoid the fungus problem.

The 4' x 4' bed of "baby" strawberry plants was a thick mass of plants, but I decided to leave it until it finishes bearing fruit this spring. From my side-by-side comparison, I am now convinced that strawberries should be kept in manicured beds, removing the babies, and keeping them spaced out. I've observed the following:
  • the neat bed ripens earlier (more sunshine?)
  • the neat bed is easier to harvest - vs. hunting among tangled leaves and stems to uncover ripe berries
  • the neat bed honestly produces sweeter tasting berries 
  • the neat bed produces much fewer berries which show critter damage
  • we've had relatively dry weather during this harvest time, but I think the mass bed would have had more berries rot from moisture than the neat bed if it had been damp
I've also learned how wonderful it is to pick strawberries from my own gardens rather than go to a u-pick strawberry farm. I know mine are organic, I can pick at my convenience, and my harvest is stretched out over many weeks rather than dealing with 3 gallons all at once. On four separate days I have filled the gallon bucket, with lots of smaller harvests in between. We've been eating loads of fresh strawberries: in a salad with my homemade raspberry vinaigrette and feta cheese, chopped and mixed into yogurt or a smoothie, sitting on our breakfast granola, or just "naked," still warm from the sun. I also substituted strawberries for the cranberries in my pumpkin bread recipe, and it now ranks as one of my favorite breakfast breads ever. I have frozen 12 bags of chopped strawberries, and just finished making 8 half-pints of strawberry jam. The strawberry season is winding down, but we'll be enjoying the harvest for months.

5/19/11

May in the Vegetable Garden

My May vegetable garden attests to the long growing season here and to the favorable conditions this spring has presented… although 45 degrees felt very chilly this morning, just a week after we sweated at 90 degrees. I've never had such a variety of crops at one time, and I've already harvested a great deal. Since my garden only feeds two, I can get by with just a few plants of many vegetables, unless I plan to preserve excess harvests.

Miraculously, the garden was spared damage from the tornado which hit us 3 weeks ago. The garden photo reveals some of the tornado damage beyond the garden - a huge uprooted shagbark hickory on the left and a dogwood which was partially uprooted so we trimmed, uprighted, and staked it to see if it will survive.

WEEDS - Visitors ask why there are no weeds in my vegetable garden and I say "I don't plant any." I'm not trying to be a wise guy, it's true. If you continually keep weeds from the garden, they don't have the chance to grow tall, flower, and drop seeds for new plants. This is especially true in the springtime. If you keep up with the weeding early in the season, you'll have fewer and fewer weeds growing as the garden matures through the summer. My largest source of weeds is from the composted cow manure I use which came from free-ranging cows - evidently the cow digestive system does not destroy seeds in their pasture. My own compost also sprouts lots of tomato seeds, which appear to be strong enough to remain viable through the heat process of breaking the plant material into compost.

  1. PEA PODS are now being harvested by the bucketful! In late February I planted seven 15 foot rows, with two "bush" varieties: heirloom Oregon Sugar Snap II and hybrid Burpee Sugar Sprint. I didn't mail order these seeds because planting pea pods was an afterthought, so I bought these locally. Both types are sweet, stringless and delicious raw or lightly cooked. I've frozen 12 bags and I might try using some of the fatter latter variety as refrigerator pickles soon.
  2. EGGPLANT - As in past years, I am fighting a pest which is eating holes in the leaves on the two seedlings I've planted. Next step will be to cover them with netting which I can remove when they flower, which won't be for quite a while.
  3. STRAWBERRIES - My previous post extols the fabulous strawberries I've harvested for the last 4 weeks.
  4. GARLIC - If you've planted garlic and it sends up a thick center stem with a small bulb shape at the top, then it is attempting to flower. Cut the stalk off as low as possible. I then take this piece and cut it into 1/2" pieces and scatter it as a repellent around plants which are most susceptible to bug attacks. These "scapes" also look exotic in a flower arrangement. Onions send up a similar flower stalk, so cut it also, to avoid a thick tough center to your harvested onions.
  5. PEPPERS - One jalapeno has been in a red "Kozy Koat" for many weeks, staying warm and healthy, and I'll transplant one more jalapeno seedling from the cold frame in early June. I've also planted heirloom seedlings of one sweet California Giant and one Pimento sweet pepper into short tomato cages.
  6. TOMATOES - All six plants are doing well, with very different growth characteristics for each of the 4 heirloom varieties. All the plants are flowering and there are green tomatoes on 4 plants. I've been at war with white flies on one plant, but I'm winning so far.
  7. BRUSSELS SPROUTS - I think I see the little "sprouts" beginning to form at each leaf branch, and the pest that was eating holes in the leaves initially is no longer around…. yeah!
  8. BEETS - I am thinning my beet plantings as I pick greens for salads and sauteing, and I'll allow some to remain in the growth to harvest later for the beet roots.
  9. PARSLEY - I'm harvesting both flat Italian parsley and curly parsley now, from seedlings I set in the garden in early March.
Also in the garden:
  • MELON - One "casaba" melon seedling has been planted and is thriving. I also planted seeds of Hale's Best cantaloupe in one hill, which have not germinated yet (planted a backup in a pot and three little sprouts have emerged from the potting soil).
  • ZUCCHINI - When I planted my one strongest seedling it already had tiny flowers starting, and is looking healthy now. I'll be on the watch for the squash vine borer.
  • LEEKS - When my seedlings got to 9" tall, I planted them in the garden, 8" deep. Most seem to be growing.
  • AMARANTH - You might know this as a grain, which I would get as seeds if the plants reach 9 feet and grew a showy flowering plume, but I've direct seeded a 2' x 3' area thickly as a salad green… or I should say a salad "red", since that's the leaf color.
  • CUCUMBERS - One seedling each of two heirloom pickling varieties is now planted and I am experimenting with growing vertically, training the vines up a twisted pole set inside a tall tomato cage.
  • LETTUCE - We've been eating and sharing a great harvest of Black Seeded Simpson and mixed Romaine. I direct sowed seeds of the heirloom "Little Gem" which is supposed to tolerate heat better than other lettuces. I pulled out all the Amish Deer Tongue and donated it to my compost bin, since I didn't like the flavor or texture as well as the others I had available to eat.
  • CARROTS - I've thinned the carrot bed so none are closer than 1", replanting those I pulled. Growing carrots is slow, but hopefully my patience will be rewarded at harvest time. I just planted a few rows of the Scarlet Nantes variety, next to the Red Chanterey and Danvers already growing.
  • SPINACH - I harvested the fall planting of spinach and chopped and froze many bags. I am now harvesting leaves from seeds I direct sowed in March. If your spinach sends up a center stem with a triangle growth on top, it is beginning to "bolt" and go to seed. Three factors make this happen: length of day, heat, and crowding. You can't control the first two, but avoid the overcrowding by harvesting every other plant.
  • GREEN BEANS - I've direct sowed three areas with rows of my favorite Blue Lake bush bean, which grows about 2' tall and doesn't need trellising. Hopefully I can avoid the pest which ate holes in the leaves and beans last year and have a bountiful harvest for fresh eating and freezing.
  • KALE - as with the spinach, I harvested and froze the fall planting of kale and now I am ready to start harvesting a small square of kale I direct seeded in March. Like spinach and many lettuces, kale will "bolt" in hot weather.
  • BOK CHOY - I'm throwing in the towel on chinese vegetables until next winter's plantings, since I can't ward off the bugs that are eating the leaves.
  • CHRYSANTHEMUMS - These lovely garden flowers are edible, so they are justified to be mentioned in this blog. In oriental countries they also eat the leaves of some varieties as salad greens. If you've planted the potted flowering chrysanthemums from last fall, you'll discover they are quite winter-hardy and have sent up new growth. To keep your plants from flowering in August versus October, and to create beautiful nursery-type fullness, you need to keep pinching off the top growth now. I once read to cut the tops back "3 times before the fourth of July" for my area (zone 7), so you can adjust for your location. Basically, I keep pinching off the branches to about 3" tall, then let them grow untouched after early July. My fall flowering is fabulous, with flowers so thick in October and November that you can't see the green leaves below. Also, if those green tops you snip off are a few inches long, you can strip the bottom leaves, dip in rooting hormone, and plant your cuttings. They re-root very easily. I only have one white mum, lots of purples, so the first time I pinched back the white one I re-planted 30 little cuttings - and they are all growing! I could easily start a mum farm at this rate. I always plant cuttings in my vegetable garden, knowing they won't get ignored there. Once the cutting show new growth, pinch them as necessary too. Replant in permanent locations in late summer - or pot to give as gifts!
  • ONIONS - Still growing strong. A friend told me last year that onions like being continually fertilized up until one month before harvest. This year I am fertilizing the entire garden with organic fertilizers every 2 weeks. Each green "scallion" from the onion indicates a layer of growth on the onion root. I harvest the greens for salads and recipes, one from this onion, one from another, and it doesn't disturb the onion growth.
Happy gardening!


    4/6/11

    April in the Vegetable Garden


    Take a tour of my vegetable garden! Starting with this post, I'll photograph it during the first week of each month, and describe what's growing. Keep in mind that I'm in Tennessee, USDA gardening zone 7, with an average last frost date of April 15th, and a frost-free growing season of nearly 200 days. My "birdseed view" is taken from my east porch.

    This year I'm starting all my vegetable plants from seeds, either indoors to get a jump on the season or directly in the garden. Indoors, they move from the south-facing windows in our dining area to the south window in the walk-out basement, which is at about 55 degrees this time of year. From there they move into the cold frame to harden off with cooler nighttime temperatures.

    The garden is about 20' x 40', running east-west. Big poplar logs hold the soil and I dig walking paths between raised beds which are about 3-4' wide. The garden is on a slight downhill slope.

    Here is the April tour:
    1. A thin red plastic mulch warms the soil and cuts down on weeds. I laid this down in mid-March, burying the ends with soil. I planted 3 tomato plants yesterday, cutting a 5" slot into the plastic, inserting the plant, and placing 4 rocks around the hole opening, to keep the wind from getting under the plastic. The south end has one tomato plant in a "Kozy Koat" - a red plastic sleeve with pockets filled with water to permit solar heating for the plant. I'll remove the Koat when the weather warms. (The other Kozy Koat shown with a white feed bag for mulching was planted in mid-March, to attempt a headstart on tomato harvests). The mulch is one of my attempts to prevent tomato blight.
    2. The yellow flowers are on my Chinese cabbage, planted last fall along with the kale in this row. As soon as we got some early warm days, the cabbage set flowers. I've left them growing for several reasons: the flowers are pretty and attract bees; the flowers are edible, tasting like raw broccoli; the flowers produce tiny edible seed pods, which I have cooked in a stirfry. I just need to remove them before the pods ripen and drop hundreds of seeds into my soft garden soil!
    3. Eight rows of snap peas were planted as soon as I could work the soil in February. This east end of the garden is where I have grown my sweet potatoes for the past 2 years, allowing the long vines to grow out the back end of the garden. I am growing the peas here not only to harvest their delicious pods, but also to utilize their ability to add nitrogen to the soil. I grow "bush" varieties, which grown only about 24" tall, and I push branches into the ground for the tendrils to wind up. By June, when it is warm enough to plant the sweet potatoes, the peas will be harvested.
    4. My June-bearing strawberry bed runs along the north wall of the garden, and the plants are flowering profusely now. The big mass of greenery above the word "north" is an area where last year's strawberry babies congregated! I'll dig these up after my harvest; strawberries produce best when not too crowded. If anyone nearby wants to start a strawberry bed, please let me know and I'll provide loads of healthy plants. I think the variety was "Tennessee Beauty".
    5. Next to the strawberry crowd I sowed seed beds in this row in March for black seeded simpson lettuce, kale, bok choy, and spinach - all cold-hardy plants. They have all sprouted and are growing slowly.
    6. Nine brussel sprout plants, started indoors in January, are growing here. I have sprayed a few times with garlic spray, fighting an insect which is eating holes in the leaves. Otherwise the plants look good - this is my first try at growing this veggie. I never really liked it, but a friend prepares it in a very tasty way. I figured if I liked his store-bought brussel sprouts, I'd love home grown! The brussel sprouts are bordered by romaine lettuce and yellow onions (I put in about 150 onion sets in Feb). Along the south border are loads of spinach plants which I started directly in the garden by seed last fall. The little spinach plants didn't grown much in the winter, but they survived two snow storms and lots of freezes and are now growing strong… great raw and cooked!
    7. Garden fresh carrots taste so good, that I am giving them another try this year. I planted 5 close rows and covered them with the tall grass I cut from my blue flax in the flower gardens - there were no seeds in the grass and it is fine and lightweight, so it has kept the carrot seeds moist and encouraged good germination. I started another 4 rows next the the first planting, and hand raked the grass clippings over them. Next to that tan mass are some garlic, planted last fall, with a row of Amish Deer Tongue lettuce. Along one side of the carrot bed is a late winter planting of Chinese cabbage, and along the opposite side is pak choy, a mini bok choy.
    8. The front of the garden has been planted with loads of garlic since last fall, which will be harvested in June-July, in addition to more onion sets, Chioggia beet seeds set out for harvesting the greens as well as the roots (they are pink and white inside), flat and curly parsley, and fennel
    9. My Juwel cold frame is permanently set in the corner, where I can easily adjust the lids according to the weather, harvest the red romaine and spinach that grew in it all winter, and move pots of seedlings in and out. Behind the cold frame I've planted some cilantro, hoping the shade will keep it cool enough so it won't bolt (cilantro likes cold weather, but I like it when the tomatoes are ripe for salsa!)

    Have fun in your garden on these gorgeous days of spring.

    3/29/11

    15 Tips from Judy's Kitchen

    This is not your usual list of hints, but a few favorites I'd like to share from my kitchen:

    1. Clean the Can
    If your can opener ever drops the lid into the can, or you use the lid to drain off liquid from the contents, be careful. Before opening the can, wash the top with dish soap, rinse and dry. This way you won't contaminate the contents.

    2. Unbleached Paper Goods
    If you use coffee filters or parchment paper, buy the unbleached versions. Just a small step to avoid toxins in your food. My supermarket sells the regular parchment with tin foil and plastic bags, an the unbleached version is sold with the baking goods like chocolate morsels - can't figure that one!

    3. Dried Citrus Peel
    If you are fortunate to grow your own citrus fruit or you buy organic, save the peel. It dries quickly on a paper towel laid on the counter. Once dried, I put orange, lemon, or lime peel through the coffee grinder, store in a spice jar, and use them as easy flavor enhancers for baked goods, salad dressings, etc. Best to use peel that doesn't have a thick white layer, since that part tastes bitter.

    4. Foolproof pasta al dente:
    Boil plain water in a big pot, then add your pasta. Stir until it returns to a boil, then cover and remove from the heat. Let it sit for the minimum amount of cooking time on the pasta box instructions. Drain. This always cooks pasta perfectly for me, and it conserves energy too.

    5. Remove Sticky Labels
    I've tried cooking oil and smelly commercial goo-remover, but the best sticky residue remover I have found is Citra-Solv concentrated cleaner, used undiluted. Smells good too.

    6. Sweetening with Stevia
    You can buy stevia powder as a sweetener much more readily these days, even in the supermarkets. I've always found it so concentrated that the tiny amount needed is hard to distribute with other ingredients. Now I use a small bottle which previously held hot sauce (very well cleaned out), so it has the plastic top with a slit that lets a few drops out at a time. I fill it with water and mix just a tiny amount of the super-sweet stevia powder. This makes it easy to shake a few drops into a not-quite-sweet-enough smoothie, which is just the right amount. It's also possible to grow stevia as an herb and dry the leaves yourself. I planted one, then harvested and air-dried the leaves on a frame with a screen attached, until the leaves were brittle. Then I powdered them in my designated coffee-grinder… still green, but super-sweet. My stevia plant came back the second year (still looking for growth this third year, after a cold winter). It grows in the mountains of South America, so I hope it is cold hardy enough for Tennessee.

    7. Jar Lids
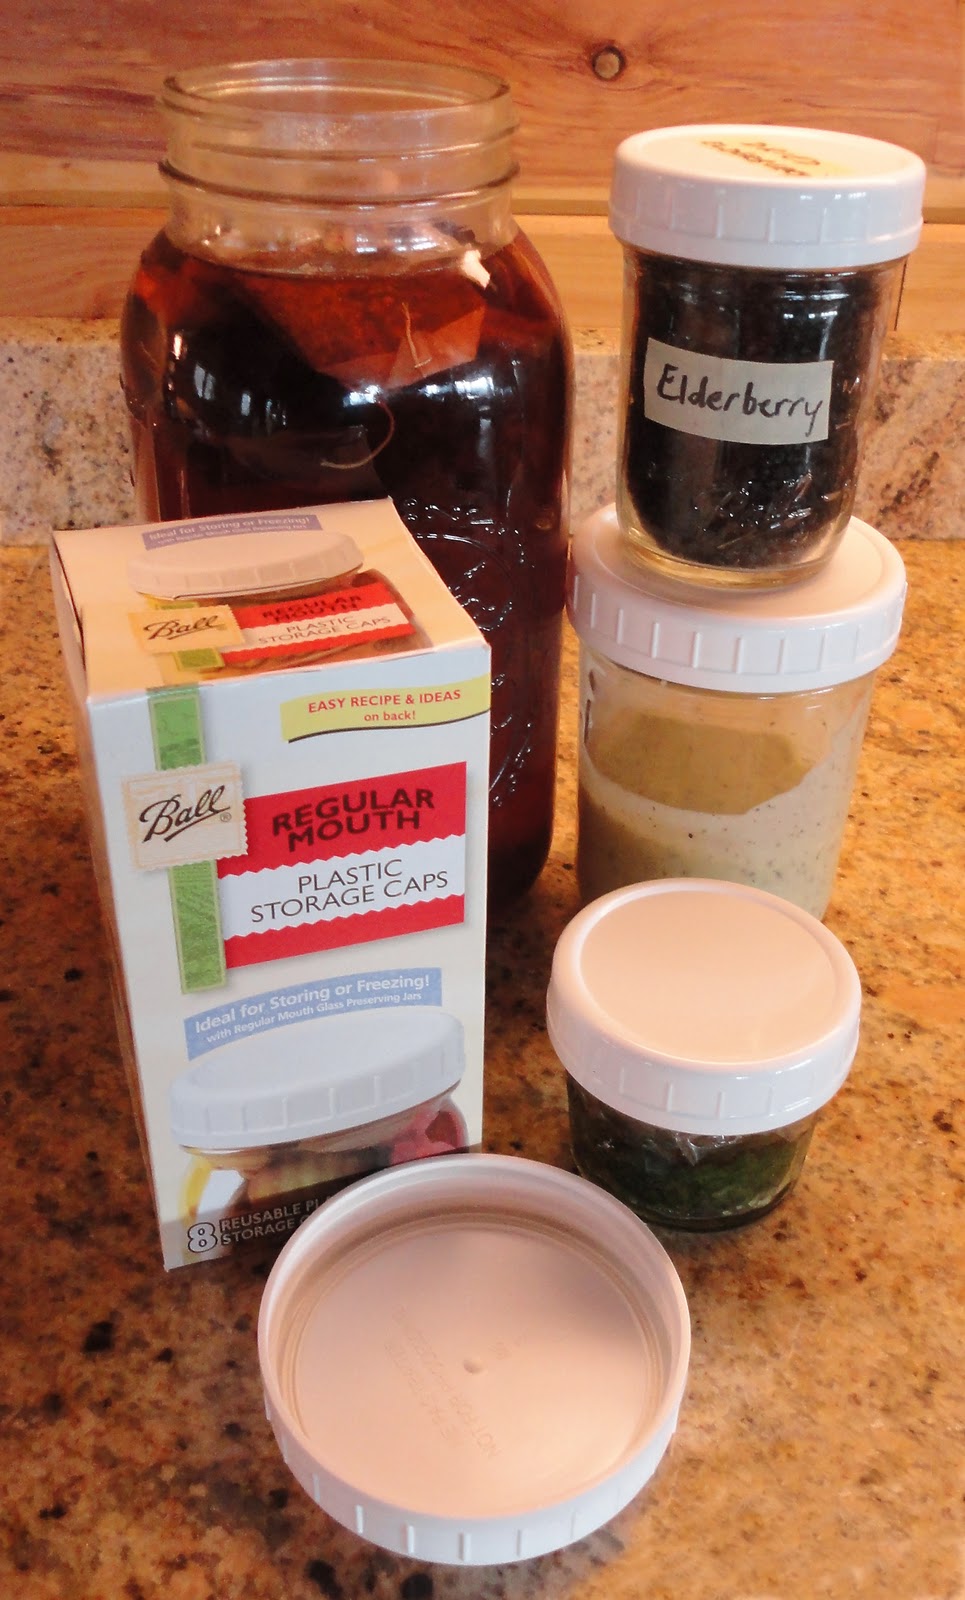
    I love having home-canned pickles, jellies, and tomatoes, but I hate those 2-part metal lids and rings. After the jar has been opened over and over and in the fridge for a while, they can start to get rusty and messy. So upon opening the jars, I replace the lids with one-piece white plastic lids (saving the screw bands for future canning). These Ball storage lids come in the regular and wide-mouth jar sizes and are sold in a box of 8, often with canning supplies. They seem fairly indestructible, and clean in the dish washer. The standard threading also fits commercial glass jars that are sold with stuff like peanut butter or mayo, so you can recycle the jars with lids which won't rust in longterm storage as the metal lids can.
     

    8. Rice Soak
    'Ever get rice stuck to the pot after cooking? Just fill with water and let it soak overnight. The rice will absorb the water and should come unstuck by morning.

    9. Crisp Celery
    After washing celery, stand it on end to drain. When dry, wrap the whole bunch in tinfoil. Store in refrigerator veggie drawer. Stays crunchy until you've used it all!
     

    10. Vacuum "Canning"
    Speaking of canning, if you have a FoodSaver vacuum machine, they make a hose accessory (standard with some deluxe models, I think) which will vacuum seal a canning jar. This isn't to use for doing pickles or other standard water-bath processed canned goods; it's for longterm storage of items like nuts, spices, grains, dehydrated foods, bread crumbs, baking mixes, freezer jams, freshly milled flour, etc. If you are sealing a powdery substance, you can just put it into a plastic bag and twist closed, and put that into the jar before sealing… this way the vacuum won't suck up the powder while sealing the jar. Contents of jars which have been vacuum sealed are impervious to moisture and air, so storage life is extending beyond just screwing a lid on the container. The product can be used and the lid sealed again and again. This attachment is sold in either the regular or wide mouth standard jar size.

    11. See What You Are Cleaning
    I'm not fond of cleaning, but I like to do the best job possible for the time I invest. For cleaning in my dimly lit lower cabinets (even for the front of the lower cabinet doors and drawers) I don a miner's headlamp. It's amazing how much better you can see into those dark corners. These are readily available, in various brightness levels, at the camping section of superstores. Bonus Tips: we keep one of these headlamps at the back door for emergency trips outdoors in the night (sick dog, etc) and they are very helpful during power outages.

    12. Powdering Sugar
    I buy refined sugar only to make food for my hummingbird feeders, and I don't keep 10x confectioner's sugar on hand. When the need arises to sprinkled superfine sugar on some baked goods, it's very easy to make my own - just put regular granulated sugar in a clean coffee grinder and whirl until powdered.

    13. Emergency Eggs
    Occasionally I'll pull out a recipe for baked goods which calls for an egg, and I find i have none. Knocking on a neighbor's door is not a real good option in my rural setting, so I keep "Ener-G Foods Egg Replacer" on hand. It's a white powder, and just 1-1/2 tsp mixes with 2 T of water to substitute for one raw egg. With that small amount, the 16 oz. box lasts a long long time. It's good to use if you avoid eggs for allergy, vegan or other dietary reasons, since it's a non-egg product. Contains potato starch, tapioca, and other ingredients. I even once used it for one of the 3 eggs in a quiche and couldn't tell the difference from using 3 real eggs.
         A second handy dehydrated egg product is Deb El "Just Whites," which is a can of just dried egg whites, no additives or preservatives… add water and stir. I hate to through away one of my fresh free range yokes when a recipe calls for just the whites, like brushing egg white on bread before baking, so this is a handy alternative. The label says it can substitute for fresh egg whites in any recipe, and even has a Meringue Cookie recipe printed on the side.

    14. Blanching Almonds
    If your recipe calls for blanched almonds, and all you have are whole raw almonds, it's easier than you might think to blanche your own. Put the almonds in a bowl and add boiling water to cover. Drain after 1 minute and rinse with cold water. The skins will slip off between your fingers.


    15. The Best Cleansers
    In the cleaning aisle of the supermarket, look for "Bon Ami" cleanser. It is my favorite for scrubbing corning casseroles, cleaning my stainless steel sinks, getting coffee and tea stains out of mugs, cleaning the stovetop. It's made in the USA, cheap (mine was 89 cents for 14 oz.), is non-abrasive, and has no perfume, chlorine or dyes added. Web site says the main ingredients are the mineral feldspar (a gentle abrasive powder) and limestone (an even softer abrasive). I also like "Bar Keepers Friend" for similar uses, and for the shower stall and glass doors.


    I hope you find these ideas helpful!